| |
|
|||||||||||
| |
|
|||||||||||
|
|
||||
| . |
|
|
|
Terms & AUP | UCE/SPAM Policy | CGI Abuse Policy | Bandwidth Usage Policy | Payment Policy | Privacy Policy |
|
How do I use Outlook Express to pick up my email? http://support.microsoft.com/support/default.asp?SD=SO&PR=out2K&RLD=26 We hope this tutorial helps! Open Outlook Express from either the icon on
your desktop or by clicking on Start-->Programs-->Outlook Express. The
following screen should appear once you open Outlook Express. Once this screen
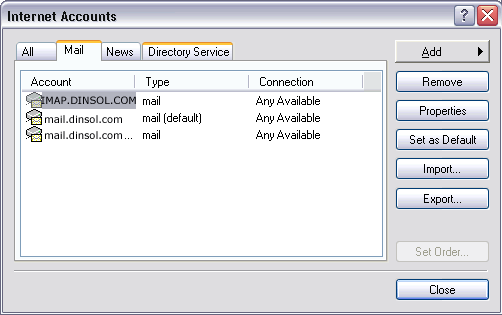
is generated, click on Tools--> Accounts... and then move onto step 2. 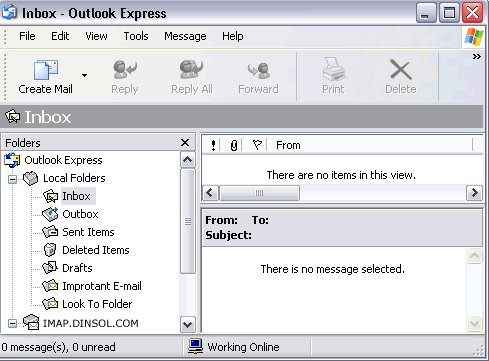 Step 2 Select the Mail heading on the Internet
Accounts screen to generate the following view. Click on Add-->Mail and move
on to step 3.
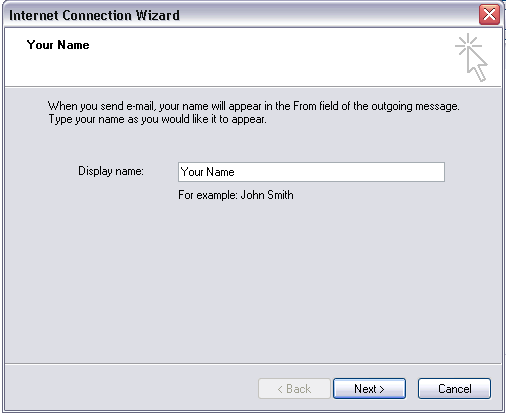
Under Display name type in the friendly name
(i.e. John Doe) that you would like to appear in the from field of your outgoing
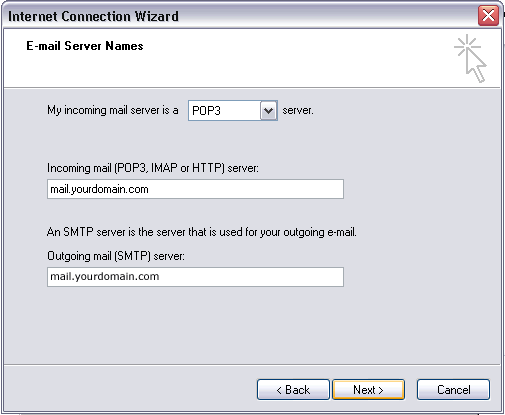
messages. Click on Next and move on to step 4. In the screen below leave the button, I already have an email address that I'd like to use, checked and enter the full address for your PLESK email account. In our example the email address is the generic user@yourdomain.com," but be sure to use your own PLESK email address when configuring your Outlook Express. Click on Next and move on to step 5. 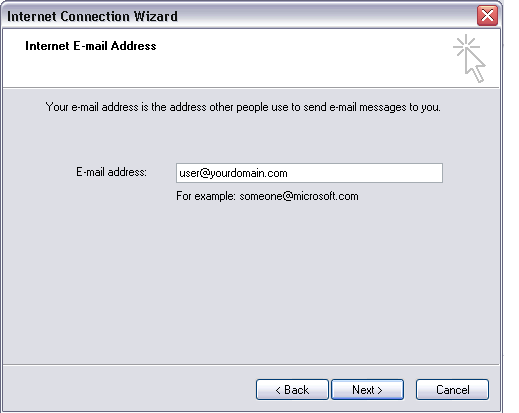 Step 5 In the Email Server Names screen below leave "POP3" selected in the "My incoming server is a POP3 server" field. Your email accounts are of the POP3 variety. In the Incoming mail ... Server field enter your assigned PLESK POP3 mail server. An example of this server name is "mail.dinsol.com", however, as Disnol.com has many mail servers, please make sure that you use the one assigned to your account. Your correct mail server information is included in your "Welcome to Dinsol.com!" message sent when your account was activated. Or you can log into your PLESK control panel and look under Report In the Outgoing mail (SMTP) server field enter
your dial-up's SMTP server. Please contact the company that is providing you
with Internet access for this information.** ** Note that we do ask that you use your dial ups SMTP server for security reasons. The SMTP server is responsible for sending email and it is standard Internet protocol that SMTP service is provided by your dial up provider. Even if you are not using a dial-up connection, SMTP service should be provided with dedicated t-l line, LAN or cable modem connections. Please contact the tech support department of the company that provides your Internet access to inquire about SMTP service. If your dial up will not allow you to use their SMTP server, you may use your PLESK POP3 server for SMTP service, however Dinsol.com does not guarantee the continued success of SMTP service due to security reasons involving sending Unsolicited Commercial Email or spam.
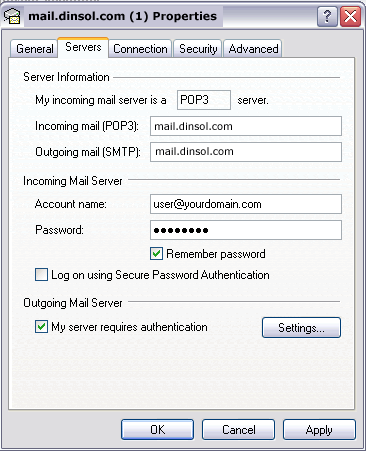
Step 6 In the Account name field place your PLESK hosted email address. In our example the email address is user@yourdomain.com.** Type in your password in the Password field, check the Remember password field if you wish this feature to be enabled and click Next. ** In certain older versions of Outlook Express
(based on the way it interacts with our mail server software) you will need to
use the format "user%yourdomain.com" instead of "user@yourdomain.com"
as the account name. Thus if you are having difficulty with this section in
versions earlier than 5.0, please insert the percent sign (%) in place of the @
symbol in the email address. 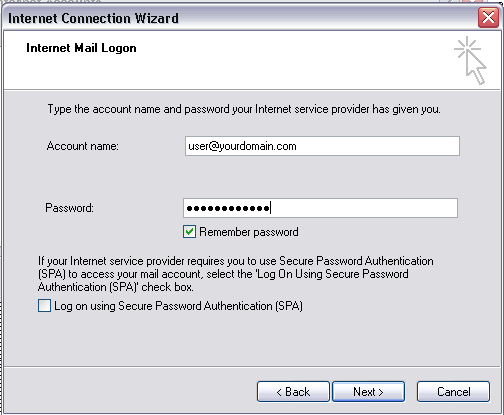 Step 7 The configuration process is now completed.
Click on Finish to enter your PLESK email address profile. 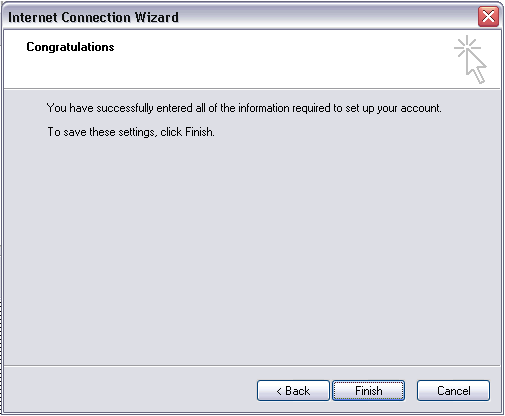 Step 8 The following screen will appear below. You may
double check the settings for your profile by selecting the Account (in our
example it is mail3.dinsol.com) so that it is highlighted in blue, and then
click on Properties. You may specify your Internet connection type in the
Connection section of your account properties, or you may simply leave the
default, "Any Available" setting selected. (Your account will be named
by its incoming mail server and keep in mind that the profile below,
"mail3.dinsol.com," is simply an example. Your incoming PLESK mail
server may be different.) Click on Close.
Once you close the above window, the following
main screen will appear. The Inbox represents the folder to which your PLESK mail will be downloaded. To retrieve your email from the incoming server, simply
click on the Send/Recv button. This should download your PLESK email and place
it in your Inbox. You are now ready to receive email using Outlook Express!
We hope this tutorial helps and please let us know if you have any further questions! |
 |